Digital Video Recorder with 2.5" Hard Drive + 7" LCD Monitor
This is the setup I use in my mobile station for Asteroidal Occultations and Lunar Grazes. It is very compact, light and cheap. There are probably better options but what I can tell you for my setup is that it is tested and it works. I decided to put this small page and provide some tips and tricks for everyone that may be moving into this sort of devices.
Before you go on here is what to expect:
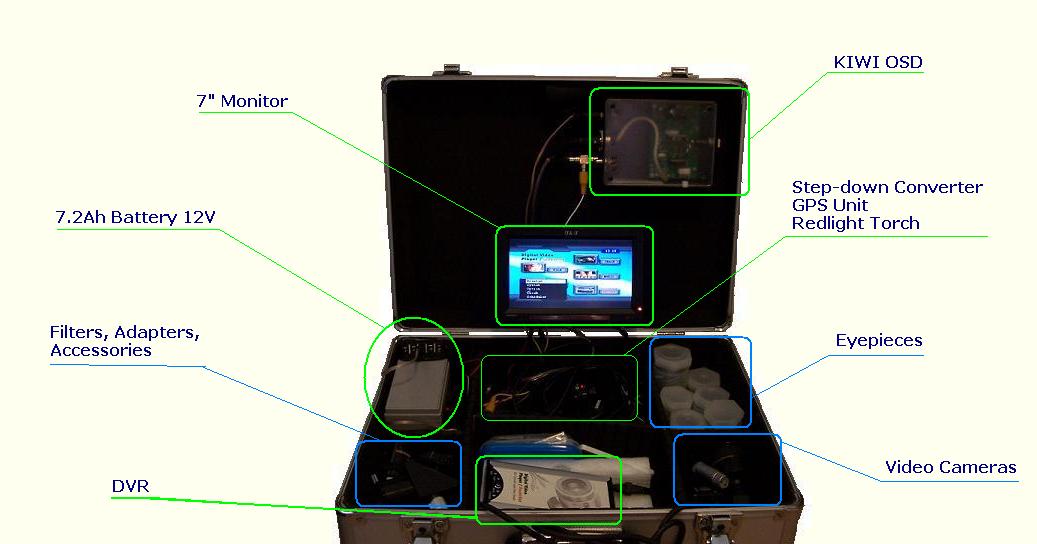
- - Total cost ~ 300 AUD. This doesn't include items circled in blue on the image above and doesn't include the case.
- - Most items are sold on e-bay. I don't know if you can buy them from somewhere else. So you need to have an e-bay account.
- - The DVR records in compressed MPEG4 format which means: (a) There is a loss of quality which I haven't found to be an issue unless the star is at the limit and (b) The file size is much smaller. 10 min record is only ~300Mb. You can record 16 hours of video on even a very small hard drive.
 |
 |
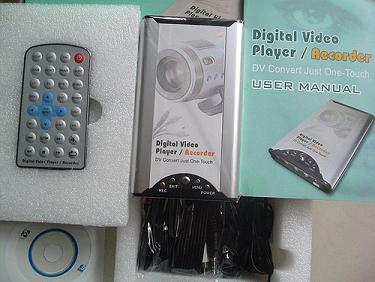
The Recorder
The video recorder is advertised on e-bay as 2.5" HDD Digital Video Recorder/Player and as I write, these devices are sold by a guy called gupeif for 110 AUD. There are two different models:
| e-bay small image |
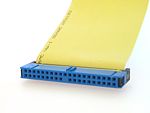
DVR without the cover | Hard drive (you need to buy one) | Cable for the hard drive shown for reference only. You don't need to buy one as you don't need one. |
IDE |
 |
 |
|
SATA |
 |
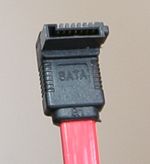 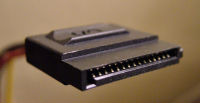 |
The only difference between the IDE and the SATA types is in the hard drives they use and as you could guess one of them uses an IDE hard drive and the other one uses an SATA hard drive. I have the IDE recorder and it works great. Occasionally I see a dropped frame but this has never caused any real issues in my 30+ observations I've made so far with it. I would recommend the SATA one as the access to the harddrive is faster but I am not sure whether this will have any effect or not on the dropped frames. The SATA drives may be more expensive than the IDE ones though.
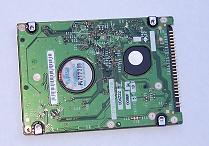
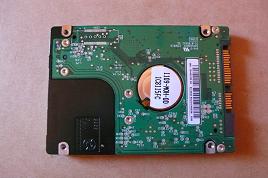
The Hard Drive
The video recorder doesn't come with a hard drive so you will need to buy one. I would recommend you to purchase the hard drive only after you have received the device. Simply go a computer shop and take the video recorder with you to ensure you get the correct type or drive. Or if you feel more confident buy a 2.5" IDE or a SATA hard drive directly or from e-bay. These are the small laptop size hard drives. You would expect to spend between 50 and 150 AUD for the drive depending on its size, model and type. I got my 30Gb IDE drive for 50 AUD from e-bay.
Getting Some Power

|
I use a 7.2Ah 12V battery to power up my mobile station. It can run everything, including my telescope (8" Meade LX90) for at least 5 hours or more. You can buy one of those batteries from JayCar Electronics for 30 AUD. The part number is SB2486. If you haven't used one of those rechargable batteries before you will have to also buy the right recharger. Please consult with an expert in the electronics store on what type of charger will be best for your battery. |
 |
This device needs a 5 volt supply. To run it off 12 volt battery you will need to purchase a step down converter. The one I selected is from JayCar Electronics for 25 AUD. The part number is MP-3038. It is a regulated DC-DC converter that can be pluged into the car cigarette lighter and outputs a range of voltages from 1.5V to 12V. I cut the lighter male plug at the end and wired it up directly to my 12V battery. I use it on 4.5V and it works perfectly. |
Assembling the Video Recorder and Formatting the Hard Drive
One of the parts which I found a bit tough was to put the hard drive in the recorder for the first time and close the cover. It took me a little while but I managed to do it. It is indeed a little bit tricky but you'll get the hang of it. Just try not to use a hammer and don't push it too hard as you don't want to break the thing :)
The next challenge may be to format the hard drive if it is larger than 30Gb. The DVR only recognizes FAT32 file system and if your hard drive is bigger than 30Gb you won't be able to format it on Windows XP and older versions of Windows because this is not supported by Windows. The DVR has its own format function and if you start it with unformatted disk it will detect that and will kindly offer you to format it for you. However there is catch ... it will only format one partition of 3.3 Gb and will leave the rest of the disk unformatted.

Fortunately there are free programs that can format large disks in FAT32. One that is tested and works is called fat32format and can be found here. If the link doesn't work then you can also download a copy from my site. However if you had already started your DVR and accepted the kind offer your drive to be formatted, the fat32format will not work because of the already created 3.3 Gb partition by the DVR software. In this case you will need to connect the DVR to your Windows computer via USB and then delete the 3.3Gb partition from the Disk Manager leaving the whole disk "Unallocated". After that you will be able to use fat32format to format the whole disk in FAT32. Thanks to Dave Gault for finding all those details :)
Updating the Firmware
Initially I also had another issue with the recorder as it was not accepting the input from my occultation video camera may be because the signal was "too dark". As soon as I enter the "Preview" mode it was showing a meesage "No input could be detected". It was working fine If I put a different input for example a recorded video, TV etc but not with my camera attached to the telescope. I communicated with the e-bay seller who turned out to be helpful but somewhat slow in his responses and he finally send me an update of the firmware of the recorder from the factory.
If you are experiencing the same issue then you will need to upgrade your firmware but thats very easy. If even after the upgrade you still have problems or if you have a different version of the video recorder then you may need to contact the seller directly and ask for a firmware update for your device version.
IMPORTANT: If you try to apply this firmware update to a device with a different hardware version you may not be able to use your digital recorder again. I take no responsibility if this happens to you :)
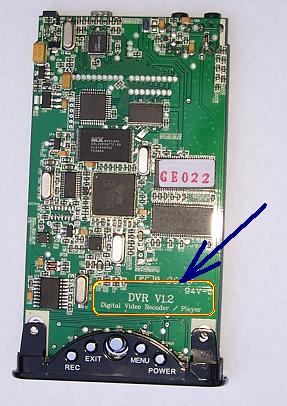
Firstly you need to identify the hardware version of your recorder. To do that open its cover and find the version label (See the image below). The firmware update here is only to be applied if your hardware version is V1.2 or V1.21. Once you have identified that you have exactly version 1.2 or 1.21 you should check what is the version of your firmware as it may already be a later version. To see your firmware version press the "Menu" button on the box and then choose "System". The last line should display the firmare version. The firware for DVRs 1.2 and 1.21 that have been tested to work are shown in the table below. Thanks to Dave Gault for sorting out his 1.21 DVR and sending me the firmware files.
| DVR Version | HDD Type | Operation | Firmware Version | Download Location |
| 1.2 | IDE | Upgrade | 1.00.1209 | firmware ver 1.00.1209 for DVR ver 1.2 |
| 1.21 | SATA | Downgrade | 1.00.0621 | firmware ver 1.00.0621 for DVR ver 1.21 |
| 1.4.1 | SATA | Downgrade | 1.00.0621 | firmware ver 1.00.0621 for DVR ver 1.21 |
If your version number is bigger than this and you have problems with your DRV then you may still decide to downgrade on your own risk or you may contact your reseller. I have also successfully downgraded a SATA DVR hardware version 1.4.1 from firmware version 1.00.1105 to 1.00.0612. Even that the firmware was for hardware version 1.2 in the end everything worked okay. I also put firmware 1.00.1105 for DVR 1.4.1 SATA available for download. The only reason I could see to install this firmware version is if the downgrade to 1.00.0621 has caused issues with your DVR 1.4.1
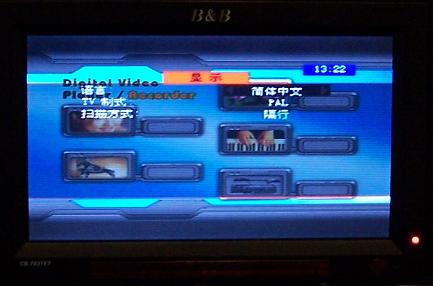
Another thing is that after you update your firmaware the language will be reset to the default one which could be Chinese. If this happens (it happened to me) you will need to find your ways through the menu in Chinese to change the language to English. I will recommend you practicing this before you go on with the firmware upgrade. Try to remember the positions of the menu items you need to click to change the language back to English.
| Finding the hardware version of the DVR | The screen in Chinese to change the language setting |
 |
 |
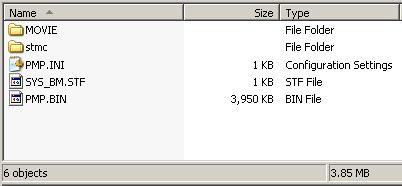
Once you feel confident enough with changing the language back to English download the firmware files from the links in table above. Save the file on your computer and then unzip it. Then connect the video recorder to your computer via the USB port and copy the extracted PMP.BIN file to the root directory of the hard drive of the video recorder. Then unplug the device from the USB port and start it up. Go to "Menu" -> "System" and choose the "Update Firmware". DO NOT CUT THE POWER WHILE THE UPDATE IS RIUNNING. If you do that you may not be able to use the device again. Once the update has finished (takes about a minute from memory) restart it. If it starts up then everything has finished successfully.
And some tips.
(1) After you have finished recording your videos make sure you exit the device properly or your last video file may get corrupted. This happened to me 2 times. To exit properly first use the "Exit" key on the remote control (or on the box) to exit in the main menu and then press the red button on the remote control to shut down the device. You will see a message on the screen "System is shutting down. Please wait". Then press the "Power" button on the box to switch the power off.
(2) Dave Gault, who built exactly the same station as me, reported that he had to press the record button twice to start recording. If the DVR is recording there will be a flashing red marker at the top right corner of the preview screen that reads "Recording". Also the LEDs on the cover will be flashing as well.
(3) When you connect the recorder to your computer you may need to plug both the two ends of the cable to two different USB ports.
| This is how the video recorder's hard drive should look like after you have copied the PMP.BIN file and before running the firmware update. |
Use the "red" button on the remote control to shut down the system safely. |
 |
 |
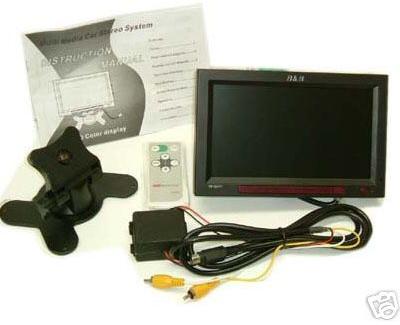
The Monitor
And finally I bought my monitor for 80 AUD from e-bay from a seller called 1679phillip from his Parzdi Store. The monitor is advertised as TFT LCD 7' Monitor-----For Car DVD & Rear Camera. Of course you can get a different one. There are heaps of small LCD monitors on ebay just search for 7" LCD.
One of the things I like about this one, other than it is cheap, is that it has two channels and two video inputs. I use both of them, one of the direct signal from the telescope which gives better on screen resolution and the other one for the digital video recorder output so I can navigate through the menus.
Working with MPEG4 Compression
Your final problem may be to open the files saved by the recorder because it uses MPEG4 compression and XviD codec. If you have problems playing the recorded video files or loading them in LiMovie see my artcile on how to work with video codecs.
Compression, Timing Precision, Noise and Dropped Frames
I see dropped frames occationally but they haven't caused problems with occultations. The dropped frames may cause issues with astrometry of fast moving NEAs when you have to measure a specific frame which is missing. If the star is very faint the noise from the compression may also become a concern so don't try to push it to the limits.
At the Second Trans-Tasman Symposium on Occultations in Penrith I demonstrated my station and a question was asked whether the MPEG4 compression of the video was causing any delay of the frames. I did a test and recorded 20 min video of the flashing KIWI LED with my WAT 902H camera. The analysis showed that there was no delay and the flashes of the KIWI LED were agreeing with the KIWI whole second timestapms at all times.
 |
I hope all this information was useful. If you have any comments or if you have any questions please contact me directy.
Hristo Pavlov, 9 May 2008 (Last updated: 19 Mar 2009)