| Tangra 1.4 |
| TANGRA | VIDEO RENDERING | PHOTOMETRY | PRE-PROCESSING | TRACKING | LIGHT CURVES | ASTROMETRY | ADD-INS | LICENSE | DOWNLOAD |
Entering Video Times
(See also Step-by-Step LightCurve Reduction Examples)
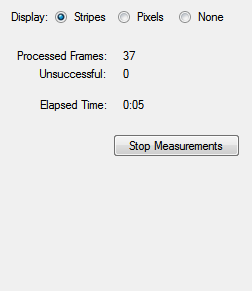
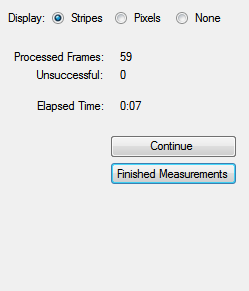
The measuring process can be stopped at any time using the "Stop Measurements" button. Stopping the measurements doesn't necessarily finish the light curve measurement. A reason to stop the measurement could also be to make manual corrections to the tracking for example in case of a lost tracking. Once the measurement is stopped, pressing "Continue" will continue taking into account any manual tracking corrections done by the user and pressing "Finished Measurements" will actually stop the measuring process and will move to entering the start and end times.
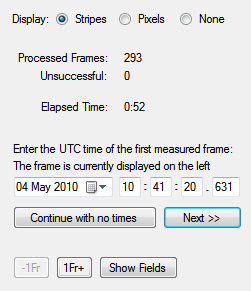
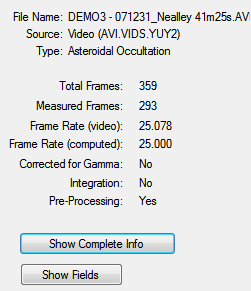
Tangra will automatically move to the first frame that is not duplicated with the previous or the next frame and will wait for the user to enter the time of the frame. Usually when a video time inserter is used with occultations the time can be read from the frame. In the case where some of the numbers are overlapping, because what is timestamped is actually the two interlaced fields, the user can use the "Show Fields" button for Tangra to separate the two fields and make the timestamps readable. The "-1Fr" and "+1Fr" buttons can be used to choose a different frame to enter time of. In a case where there is no timestamp available or if user doesn't want Tangra to compute the exposure time of the frames automatically, "Continue with no times" button can be used.
After the frame time has been entered and when the user presses "Next >>" Tangra will position the video to the last measured frame which is not a duplicated frame. Again the user is expected to enter the time as read from the frame timestamp. After this is done Tangra will open up the video light curve and will also show some basic statistics about the measured video including the computer frame rate (from the entered times) and the frame rate recorded in the video file.
 |
 |
 |
 |
Light Curve
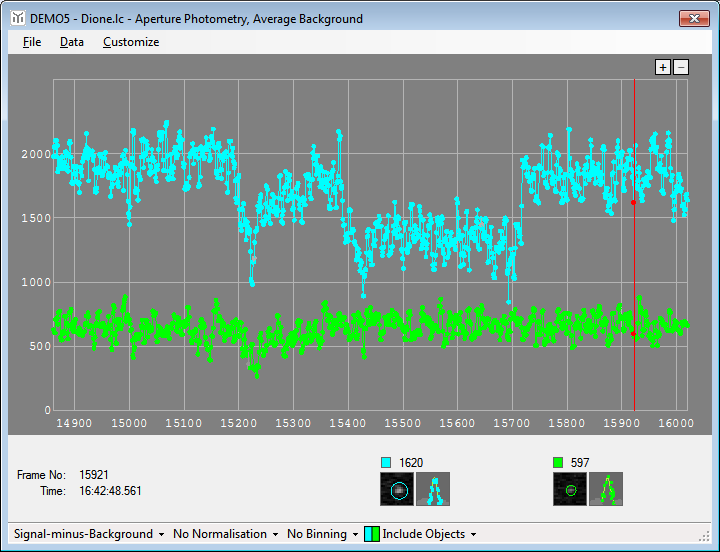
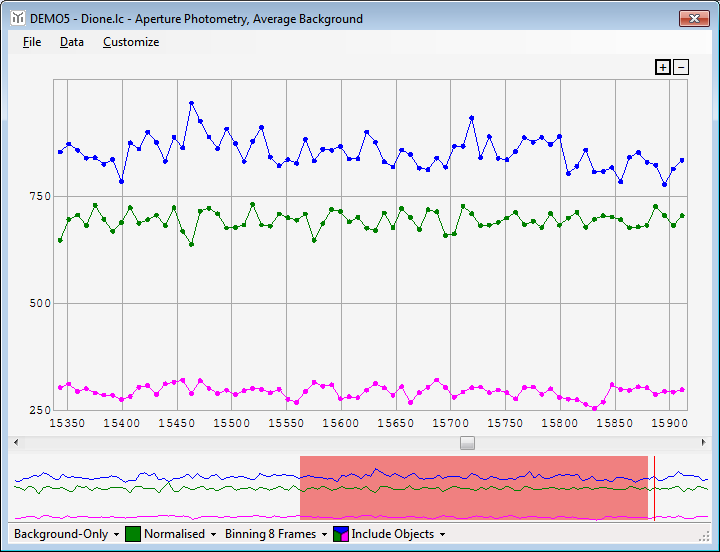
Light curves can be customized in a number of ways. This is usually managed from the status bar pop-up buttons. The default plotted light curve is that of the Signal - Background measurement versus time. This can be also customized to show either the Signal only or the Background only bands. Then the data can be both normalized and binned.
Futrther to this the light curve data can be exported to Excel or saved as an .lc file. This is a special file format which actually includes a 37x37 pixel area around each of the measured objects in each of the measured frames which allows the measurements to be reprocessed at a later time without having the light curve. The .lc is much smaller than the video and can be sent to and opened by anyone that has Tangra installed. The user can also zoom in to check only a details of the light curve and to change the colour scheme used.
 |
 |
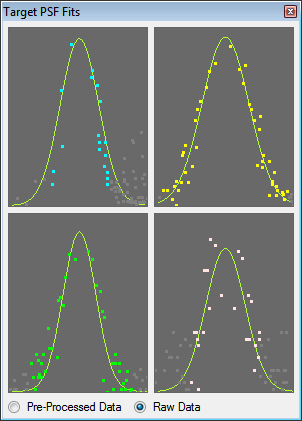
Next to the light curve Tangra will show either the zoomed raw pixels of the objects or the PSF fits of the objects along with additional information about the tracking. Which small view will be shown is controlled from the Data menu of the light curve form.
 |
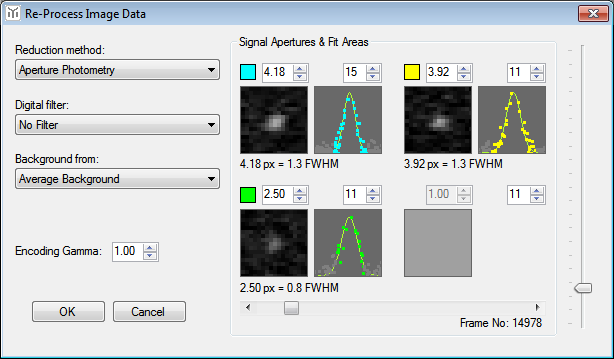
Finally the light curve can be reprocessed from the Data -> Quick Reprocess menu item and with this if the user wants she can choose a different reduction method, background method, add a digital filter for example and change the value of Gamma used.